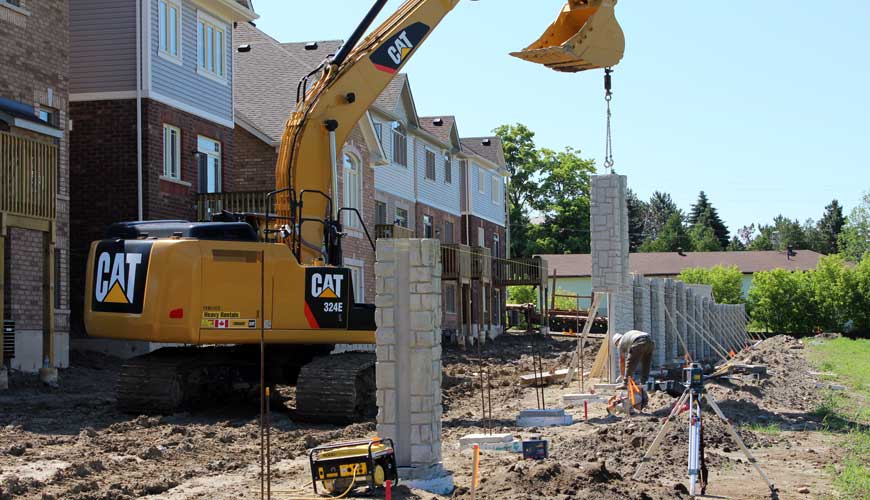
Installing the Verti-Fence system is designed to be quick and easy. Unlike real masonry walls, Verti-Fence does not require time consuming and expensive full length footings. Depending on your Verti-Fence configuration, using our precast columns or steel beams, our general guideline to install are as follows:
Step 1 – Excavate Footings
Using an auger, drill holes to size at each location where a column or post is measured to be located. Where Verti-Crete precast columns are used we suggest a 30” diameter footing to ensure the 20”x20” column has sufficient area to sit on as well as to support the panel. If using steel beams, any diameter footing can be utilized. Project engineer to specify required depths.
Step 2 – Pour and Prep Footings
Columns: Insert sono tube in hole ensuring top of sono tube is level and at final elevation (can be above or below grade). Fill excavated footing holes with concrete (strength specified by project engineer) to top of sono tube. Finish concrete so that it is smooth and level. Place rebar within the footing where the centre of the column is expected to be. Allow 3-5 days curing time depending on climate and site conditions.
Steel Beam: Fill excavated footing holes with concrete (strength specified by project engineer) to top of hole. Form top of footing as per project requirements. Insert the steel beam down into the footing measured with space to allow the panel(s) be dropped in with some additional space for clearance. Ensure beams are plum and level. Allow 3-5 days curing time depending on climate and site conditions. Skip Step 3
Step 3 – Place Column
Once footings are cured, place the first column on footing so that the exposed rebar is in the hollow core of the column. Shim the base of the column as required to ensure it is plum and level.
Step 4 – Install Panel*
Columns: After placing each precast Verti-Fence column, position and install a Verti-Fence panel. Before positioning the panel in place be sure to measure and cut the panel to suit any shortened sections or accommodate grade changes. The panel sides, when positioned in place, should be positioned completely into the column channel (tongue and groove) for a snug fit. Ensure the bottom corners of the panel rest on the footings. Support with wood beams until secured (Step 5). Proceed with installing the next column on the other side of the panel and repeat.
Steel Beam: Before positioning the panel in place be sure to measure and cut the panel to suit any shortened sections or accommodate grade changes. Install the panels between the beams by slowly dropping panels down vertically into the beam channel (tongue and groove). Shim as required for a snug fit. Repeat until completed. Skip Step 5 & 6.
*Panels have removable lifting hooks built in for easy and efficient handling.
Step 5 – Secure Column Connection/Place & Seal Column Caps
After columns and panels have been installed fill all hollow cores of the columns to the top with concrete (strength specified by project engineer) to secure the connection. Place your chosen style of column cap on top of the Verti-Fence precast column and seal. Fill any openings with grout.
Step 6 – Finish With a Water-based Stain
Bring your project to life. Select your choice of colours and apply as many highlights as required until you get the look you desire.

